
 EN
EN
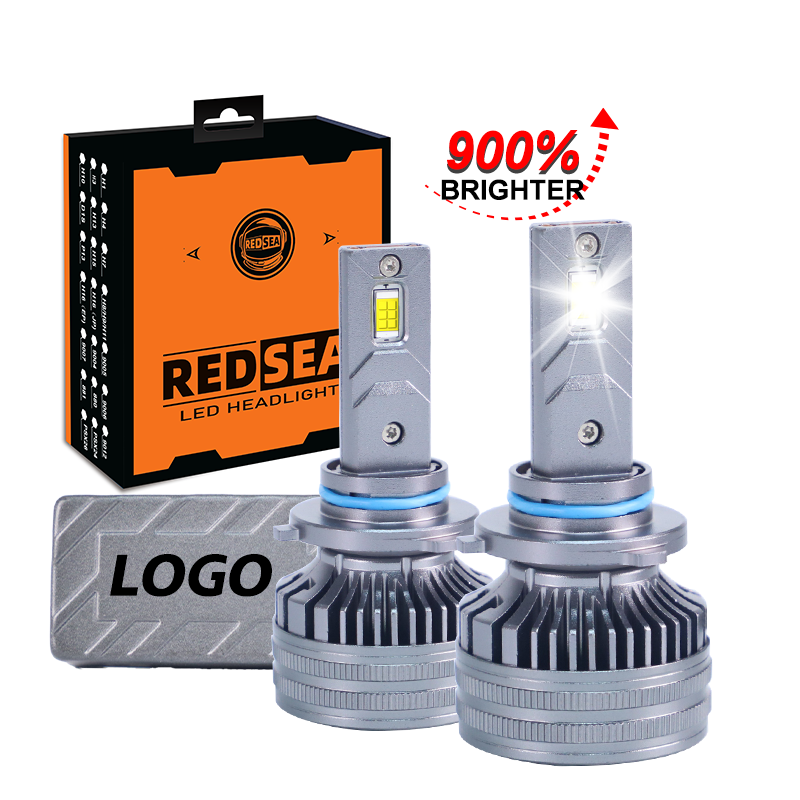
Blink eller flimren – start med CAN-bus-systemet
Én af de mest almindelige klager om bilens LED-lys er blink eller flimren. Dette sker oftest, efter at traditionelle halogenpærer er blevet udskiftet med LED-pærer. Årsagen ligger ofte i en uoverensstemmelse mellem LED-pærens lave efforbrug og din bil’s computerstyrede elsystem. Mange biler, især europæiske modeller, forventer en bestemt modstand fra pærerne. Når du monterer LED-pærer, tolker systemet det som, at en pære er brændt ud, og sender pulserede signaler, hvilket forårsager blink eller flimren.
Praktisk erfaring fra REDSEA: Som producent siden 2010 har vi set tusindvis af sådanne tilfælde. Den simpleste løsning er at tilføje en CAN-bus-dekoder eller -modstand for at simulere belastningen fra en halogenpære. De fleste kvalitetsautomatiske LED-lygter fra professionelle producenter som REDSEA er enten udstyret med et indbygget CAN-bus-system eller leveres med eksterne dekodere. Før du køber, skal du kontrollere, om produktet er mærket "CAN-bus-kompatibelt". Hvis dine lygter allerede flimrer, kan du prøve at installere en dekoder. Kontroller også, at alle stik er stramme – en løs forbindelse kan efterligne elektriske fejl.
Eksperttip: Ikke alle dekodere virker på alle biler. Kontakt din leverandør med angivelse af din bilsmærke og model. Hos REDSEA opretholder vi en kompatibilitetsdatabase baseret på mere end 15 års erfaring inden for forskning og udvikling.
Svag eller uregelmæssig lysstråle – Tjek chip-alignment og fokus
En almindelig brugerfejl er at installere LED-pærer uden at justere lysstrålen. I modsætning til halogenpærer, der udsender lys i alle retninger, har bil-LED-lygter specifikke chipplaceringer (ofte tosidet eller firsidet). Hvis chipene vender mod venstre og højre i stedet for opad og nedad efter installationen, får du en svag, spredt eller ujævn lysstråle.
Praktisk eksempel: En kunde fra Florida klagede engang over, at hans nye REDSEA LED-hovedlygtepærer var «svagere end hans gamle halogenpærer». Efter et videomøde konstaterede vi, at han havde indsat pæren med LED-chippene vendt mod klokken 3 og 9 i stedet for klokken 6 og 12. Ved at dreje pæren 90 grader blev problemet øjeblikkeligt løst.
Autoritativ anbefaling: Installer altid auto-LED-lygter, så LED-chipsene er placeret ved 3 og 9 ure (vandret) for projektorhuse eller ved 6 og 12 ure (lodret) for reflektorhuse. Tjek din bilmodels lygtehus-type.
Én side virker ikke – kontroller polaritet og tilslutninger
Når kun én LED-hovedlygte tænder, skyldes problemet sjældent selve pæren. De fleste LED-pærer er polaritetsfølsomme. Hvis du tilslutter stikket forkert vejen, tænder pæren ikke. I modsætning til halogenpærer har LED-pærer en positiv og en negativ side.
Trinvis fejlfinding:
-
• Udskift den ikke-fungerende pære med den fungerende side. Hvis den tænder, er pæren i orden – tjek bilens ledningsnet eller sikring.
-
• Hvis det stadig ikke virker, skal du kontrollere stikpolariteten. Mange REDSEA bil-LED-lamper har en polaritetsfri konstruktion, men ældre eller generiske mærker kan muligvis ikke have det.
-
• Inspectér ledningsbundten for skade, korrosion eller løse stifter. En enkelt bukket stift kan afbryde kredsløbet.
Pålideligt råd: REDSEA giver 12–24 måneders garanti på alle LED-produkter. Hvis du har bekræftet, at polariteten og tilslutningerne er korrekte, men én side stadig ikke fungerer, optag en kort video, der viser problemet, klip ledningsbundten som beskrevet, og vi sender en erstatning med din næste ordre – ingen retur er nødvendig.
Hyperblink eller hurtig blinklys-funktion – brug en belastningsmodstand
Hyperblink opstår, når dine blinklys blinker dobbelt så hurtigt som normalt. Dette sker, når du udskifter glødelamper til blinklys med bil-LED-lamper. LED’er forbruger så lidt strøm, at køretøjets blinkrelæ tror, at en lampe er brændt ud, og øger blinkhastigheden.
Løsning: Installer en lastmodstand på hver LED-pære til blinklys. Modstanden tilføjer den manglende elektriske belastning og gendanner den normale blinkfrekvens. Alternativt kan blinkrelæet udskiftes med et elektronisk relæ, der er kompatibelt med LED. Nogle moderne køretøjer har en indstilling for "pæredefekt", som en forhandler kan genprogrammere.
Ekspertindsigt fra REDSEA: I vores over 4000 kundeprojekter i 200 lande har vi fundet ud af, at mange premium bil-LED-lygter til blinklys indeholder indbyggede modstande. Hvis dine ikke gør det, er eksterne 6-ohm 50-watt modstande en standardløsning. Monter modstande altid på metaloverflader – de bliver varme.
Radioforstyrrelser eller statisk støj – installer ferritkerne
En mindre almindelig, men frustrerende fejl er elektromagnetisk forstyrrelse (EMI). Nogle lavtkvalitets bil-LED-lygter udsender radiobølgestøj, der forstyrrer AM/FM-modtagelsen eller forårsager statisk støj gennem højttalerne. Dette sker, fordi LED-driverne bruger højfrekvente skiftkredsløb.
Afprøvet løsning: Sæt en ferritkerne (også kaldet en støjdæmper) omkring strømforsyningsledningerne nær LED-pæren. Dette filtrerer højfrekvent støj. Mange professionelle automobil-LED-lygter, herunder REDSEA’s LED-xenon-strålelygter, er udstyret med EMI-abskærmning. Hvis du stadig oplever interferens, kan du prøve at flytte driverboksen væk fra antenner eller lydledninger.
Eksempel fra praksis: En lastbilflådeoperatør, der brugte almindelige LED-lygter, rapporterede konstant støj på CB-radioerne. Ved at skifte til REDSEA’s abskærmede automobil-LED-lygter forsvandt støjen helt, som bekræftet af vores laboratorietests.
Uregelmæssig drift – Undersøg temperatur og ventilation
LED’er er effektive, men producerer alligevel varme. Hvis dine automobil-LED-lygter fungerer fint i 10 minutter og derefter slukker eller blinker, skyldes det sandsynligvis termisk nedlukning. Kvalitets-LED’er har en temperatursensor, der reducerer effekten eller slukker pæren for at forhindre beskadigelse ved overophedning.
Almindelige Årsager:
-
• Støvstopperne holder varme tilbage. Bore et lille hul, eller udskift dem med ventilerede stopper.
-
• Ventilatoren er blokeret eller defekt. Lyt efter et surrende lyd – hvis den mangler, er ventilatoren muligvis død.
-
• Aluminiumsvarmeaflederen er dækket af snavs eller monteret på et trangt sted.
REDSEA’s ingeniørtilgang: Vores auto-LED-lamper bruger ventilatorer med dobbelt kugleleje og kobbersubstrater til fremragende varmeafledning. Vi tilbyder også design uden ventilator (passiv køling) til anvendelser, hvor der er risiko for støv- eller vandindtrængning. Hvis dine lamper overophedes regelmæssigt, bør du overveje at opgradere til en model med en større varmeafleder eller en ekstern driverkasse.
Kort levetid – Kontroller spænding og strømkvalitet
Hvis dine auto-LED-lamper brænder ud inden for få måneder, skal du ikke straks skyde skylden på pæren. Tjek din bil’s ladesystem. Spændingsspidser fra en defekt dynamo eller spændingsregulator kan ødelægge LED-drivere øjeblikkeligt. Den normale driftsspænding skal være 13,5–14,5 V, når motoren kører.
Diagnostiske trin:
-
• Brug en multimeter til at måle spændingen ved lygternes stikforbindelse.
-
• Søg efter korrosion eller løse jordforbindelser. En dårlig jordforbindelse forårsager spændningssvingninger.
-
• Overvej brug af en spændningsstabilisator, hvis din bil er ældre eller har elektriske modifikationer.
Autoritativ note: REDSEA’s bil-LED-lygter gennemgår 72-timers indbrændingstests og indeholder overspændingsbeskyttelse op til 30 V. Ingen beskyttelse kan dog kompensere for et alvorligt beskadiget el-system. Hvis du har udskiftet pærer tre gange på et år, bør en mekaniker inspicere din dynamo og ledninger.
Indholdsfortegnelse
- Blink eller flimren – start med CAN-bus-systemet
- Svag eller uregelmæssig lysstråle – Tjek chip-alignment og fokus
- Én side virker ikke – kontroller polaritet og tilslutninger
- Hyperblink eller hurtig blinklys-funktion – brug en belastningsmodstand
- Radioforstyrrelser eller statisk støj – installer ferritkerne
- Uregelmæssig drift – Undersøg temperatur og ventilation
- Kort levetid – Kontroller spænding og strømkvalitet