
 EN
EN
Upgrading your car’s factory halogen bulbs to LED light bulbs for car headlights is a popular modification. Many drivers are drawn to the promise of brighter, clearer, and more energy-efficient lighting. However, a common question before purchasing is whether you can handle the installation yourself or if you need to pay a professional mechanic. The answer, for the vast majority of modern vehicles, is yes, you can do it yourself. With a basic set of tools, patience, and a clear understanding, most drivers can complete this upgrade in under an hour.
Understanding What You’re Working With: The Anatomy of a DIY-Friendly LED Bulb
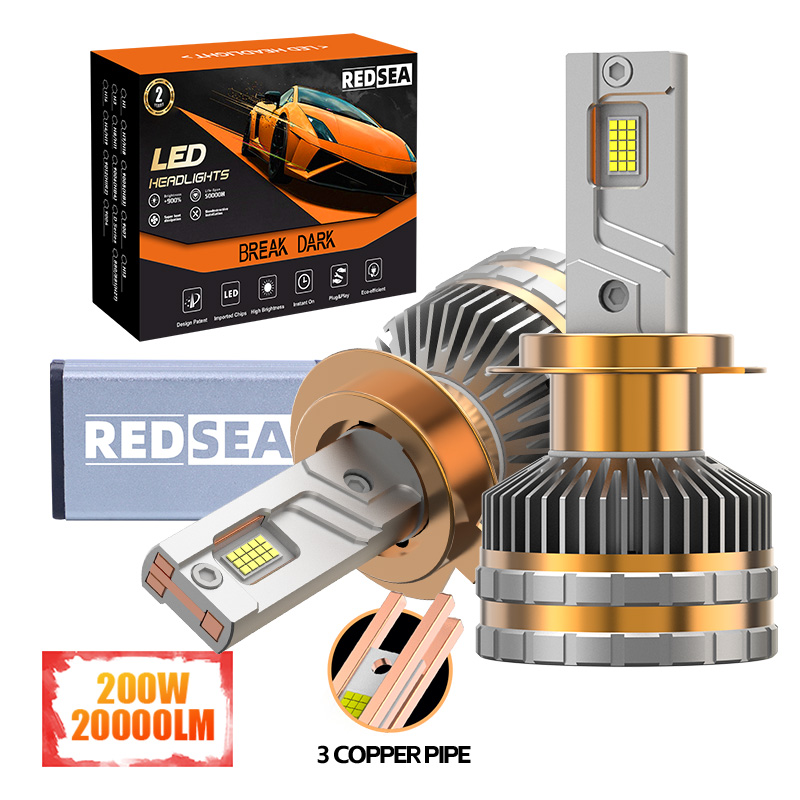
To understand why installation is usually straightforward, you need to know what a modern LED bulb looks like. Unlike old halogen bulbs that are made of glass and are fragile, quality LED light bulbs for car headlights are solid-state devices. A typical product, like those we manufacture here at REDSEA, features a few key components: a metal base (often an adapter to fit your specific car’s socket), a central driver module (a small box that regulates power), and a cooling mechanism—either a braided copper tape or a small, high-speed fan.
For example, our T Glory LED headlight bulb is designed with a compact fan for heat dissipation. This is critical because LEDs run cool to the touch but generate heat at their base. A good cooling system ensures longevity. We also offer bulbs with an IP65 waterproof rating, which means they are sealed against dust and low-pressure water jets. This robust construction gives you confidence while handling the bulb. You’re not dealing with a fragile glass tube that will shatter if you touch it with your bare fingers. This physical robustness alone makes the installation process far less intimidating for a first-timer.
The Step-by-Step Process: From Opening the Hood to Testing the Beam
Let’s walk through a typical installation. Remember, while the concept is universal, you should always consult your vehicle’s owner’s manual for model-specific instructions.
Step 1: Access the Old Bulb.
Open your car’s hood and locate the back of the headlight housing. You will usually find a rubber dust cover (pull it off) and then the base of the halogen bulb. You may need to unclip a wire retainer or twist the bulb base a quarter-turn to release it. Carefully remove the old halogen bulb without breaking it.
Step 2: Disconnect and Prepare.
Unplug the electrical connector from the old bulb. Now, take your new REDSEA LED bulb. Before you insert it, you need to attach the driver box to the bulb’s connector. Most quality bulbs, including ours, use a simple plug-and-play system—the connectors only fit one way. Once connected, you need to plan where the driver box will sit inside the housing; you can often tuck it away using zip ties.
Step 3: Insert and Lock the New Bulb.
This is the most crucial physical step. The metal base of the LED bulb must be oriented correctly to achieve the proper beam pattern. The LEDs themselves should point to the 3 and 9 o’clock positions (left and right) once locked in. Insert the bulb into the socket, twist it to lock it in place (just like the old one), and secure any retaining clips.
Step 4: Test Before Finalizing.
Before putting the dust cover back on, turn on your headlights. Check that both low beams and high beams function. If you see a flicker, simply turn the connector around—LEDs are polarized, unlike halogens. Once confirmed, tuck all wires and the driver box neatly inside the housing, and replace the rubber dust cover. If you have a bulb with a fan (like our T Glory model), ensure the cover doesn’t pinch the wires or obstruct the fan’s airflow.
The One Big Challenge: Physical Space and Adapters
While the process is simple in theory, the difficulty often lies not with the bulb itself but with the physical space inside your engine bay. Some modern cars have very tight engine compartments. You might find that your hands are too large to easily reach the back of the headlight housing. In these cases, you may need to temporarily move the air filter box or the washer fluid reservoir—a task that requires just a screwdriver or a socket wrench.
Another potential hurdle is the adapter. Your car’s socket is designed for a specific halogen bulb base (like H4, H7, 9005, or H11). REDSEA, as a manufacturer since 2010, provides custom adapters with our bulbs to ensure a snug fit. This is an area where quality matters. Cheap, generic bulbs often come with flimsy adapters that wobble, causing a poor beam pattern. Our adapters are precisely machined to lock the bulb in the exact focal point of your reflector or projector housing. As long as you select the correct bulb size for your car (you can check your old bulb or use an online guide), the adapter should work perfectly.
Addressing Real Concerns: Canbus System and Heat Management
Two common issues that worry DIY installers are “hyper-flash” (rapid blinking for turn signals) and heat. For standard headlights, the main electronic issue is the CANbus system. Many modern European and American cars have sensitive computers that check the resistance of each bulb. An LED draws much less power than a halogen, so the computer might think the bulb is “burnt out” and either shut it off or show a warning on your dashboard.
The solution is simple. Many LED bulbs, including several of our models, come with a built-in CANbus decoder. If your car still shows an error, you may need to add an external resistor (a small heatsink block) in parallel with the bulb. This is a bit more advanced, but instructions are always provided. For the vast majority of Japanese and Korean cars, this is never an issue.
As for heat, it’s actually less of a concern with LEDs. Halogen bulbs create light by heating a filament to over 2,500°C, which radiates intense heat in all directions, often melting wiring or degrading plastic housings over time. LEDs, by contrast, convert over 80% of their energy into light, not heat. The small amount of heat they do produce is at the base and is efficiently pulled away by the fan or copper braid. Our 12-24 month warranty, where we simply ask for a photo or video and for you to cut the wiring harness, is a testament to our confidence in our thermal management.
The Final Verdict: A Satisfying DIY Project for Most
So, back to the original question: Are LED light bulbs for car headlights easy to install by yourself? For the vast majority of cars—especially older models or common Japanese sedans and SUVs—the answer is a definitive yes. It’s a 15- to 45-minute project that requires no special skills beyond being able to use a screwdriver and a pair of pliers.
For a small number of newer, luxury, or tightly-packed European cars (like some Audi, BMW, or Mercedes models), the difficulty jumps from “easy” to “moderate.” In these cases, the issue is access, not the bulb’s complexity. You might need to remove the front bumper or headlight assembly entirely, which can be intimidating. In these specific scenarios, paying a mechanic for one hour of labor might be a worthwhile investment.
As a manufacturer, our goal at REDSEA is to make this process as seamless as possible. Our products, born from over 11 years of R&D experience, are designed with the end-user in mind. We provide clear instructions, correct adapters, and reliable CANbus decoders. Ultimately, by choosing a quality LED bulb that is specifically made for your car’s socket, you are setting yourself up for a successful, satisfying, and money-saving weekend project.
Table of Contents
- Understanding What You’re Working With: The Anatomy of a DIY-Friendly LED Bulb
- The Step-by-Step Process: From Opening the Hood to Testing the Beam
- The One Big Challenge: Physical Space and Adapters
- Addressing Real Concerns: Canbus System and Heat Management
- The Final Verdict: A Satisfying DIY Project for Most